Duty of Dishonor is a complex mission at the Brotherhood of Steel base and it takes awhile to complete. You might need some guidance, specially during the second phase because the whole place works like a small maze.
At The Prydwen, Captain Kells will inform you of some massive theft at the Logistics department – tons of supplies have gone missing. And no one seems to be able to find out how that’s actually happening. Your job is to find out who’s the thief or traitor. The mission starts at The Prydwen’s main deck. Don’t get lost between tasks and follow the steps below.
 1. Boston Airport
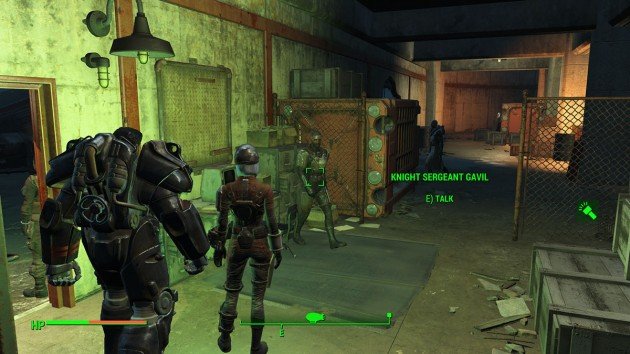
Head to the Boston Airport after receiving this mission and search for Knight-Sergeant Gavil. He’s at the Logistics department room, which is located at the ground floor in the north of the base. Just enter the main front door and head left until you see a door and a desk. He’ll be there on duty. Talk to him until he gives you a new task.
 2. Talk to Knight Lucia and Initiate Clarke
Instead of questioning everyone there, you just have to talk tot he newest members – Knight Lucia and Initiate Clarke. They’re in the same room, so just move a bit forward and you’ll see them. After talking to Knight Lucia, if your charisma is high enough you’ll get a clue about what’s going on.
3. Search for Evidence at The Prydwen
Go to the main base and search for evidence at the dormitory. You need to go take the elevator inside The Prydwen and go through Knight Lucia and Initiate Clarke’s belongings at their sleeping beds. Follow the green icons, you’ll see the container chests which you need to browse.
 4. Read Knight Lucia’s Log and Confront Her
One of the chests will contain Knight Lucia’s Log, search it in your inventory under Misc and play it with enter. You’ll soon realize that Clarke has been missing his shifts and Lucia has been covering for him as well. Go back to Boston Airport and confront her with the truth.
5. Follow Initiate Clarke
After talking to Lucia and re-creating the whole picture, you’ll have to shadow Clarke. His schedule will end and he’ll head outside the airport. Follow him on stealth mode with CTRL and keep a certain distance so he doesn’t see you. If he talks to you about what you’re doing there, say anything it doesn’t matter what you answer.
 6. Head North
Clarke will then speed up and get the hell out of there. If you miss the direction where he goes, just head north until you see a destroyed airplane and then a door. It will lead you to Boston Airport Ruins and that’s exactly where you have to go.
 7. Solving the Mini Maze
Alright, so in here you will most likely get lost. Avoid exploring and just follow the directions here in order to find Clarke. Once inside, follow the short tunnel and head to the right. You’ll realize you can’t use the elevators because it needs an ID Card. However, you can’t find any until you find Clarke.
 8. Down-floor and Ferals
Jump down to get the down level and get ready to fight. You’ll find dozens of ferals in this place. It’s creepy, they’ll come out of the water too so be careful. Once you’ve cleaned the area, head forward always until you see a blocked door, then look to your right and you’ll see a way upwards.
 9. Elevator Doors
Now, go forward until you find a door to an underground parking lot. You’ll realize the two elevator doors at your left but they’re blocked. Head right until you see two more elevator doors in front, one of them is the way below. This place is filled with ferals, so proceed with caution.
 10. To the Stations
Now, go directly to the left into the station. This new parking lot is filled with ferals too, including a Glowing One, so avoid it to do not waste time. You’ll find a few ghouls here too but the big wave is coming up next. Keep heading left through the railroad to access the next station.
 11. Front Door
Enter the station through the front door. you’ll realize there are several rooms, keep going forward until you see some downstairs at your left. Take them and you’re almost at your main destination.
 12. Forward is the Way
Just follow the corridor now and talk to Clarke, he’ll be standing in the middle of the room. You won’t be able to convince him that killing the ferals is the right thing to do, you can turn him in or kill him yourself.
 13. Way Out
You can’t go back through the way you got in, remember the elevator part? Take Clarke’s ID Card and head left, you’ll see an elevator door. Use the key to use it and you’ll end up at the ground floor where you first entered. Easy way out. Now, report back to Captain Kells to receive your reward.
Note: You can fight a Legendary Glowing One at the end of this mission, if you open the front door at Clarke’s room.

vGamerz Thanks to all our Contributors; Independent Writers, Journalists and Guest Bloggers for helping the site to became better with good an engaging content and for keeping our readers up to date with the most recent updates about all types of online games.


2 Comments
Lorenzo
I got Clark to agree to turn himself in
Marta Branco
Nice, that’s the fun in this game. There are many ways to do things.